Friday, August 30, 2013

DIY Placemats- Easy Beginner Sewing Project


I have been wanting to make something like table place mat this for a long time.

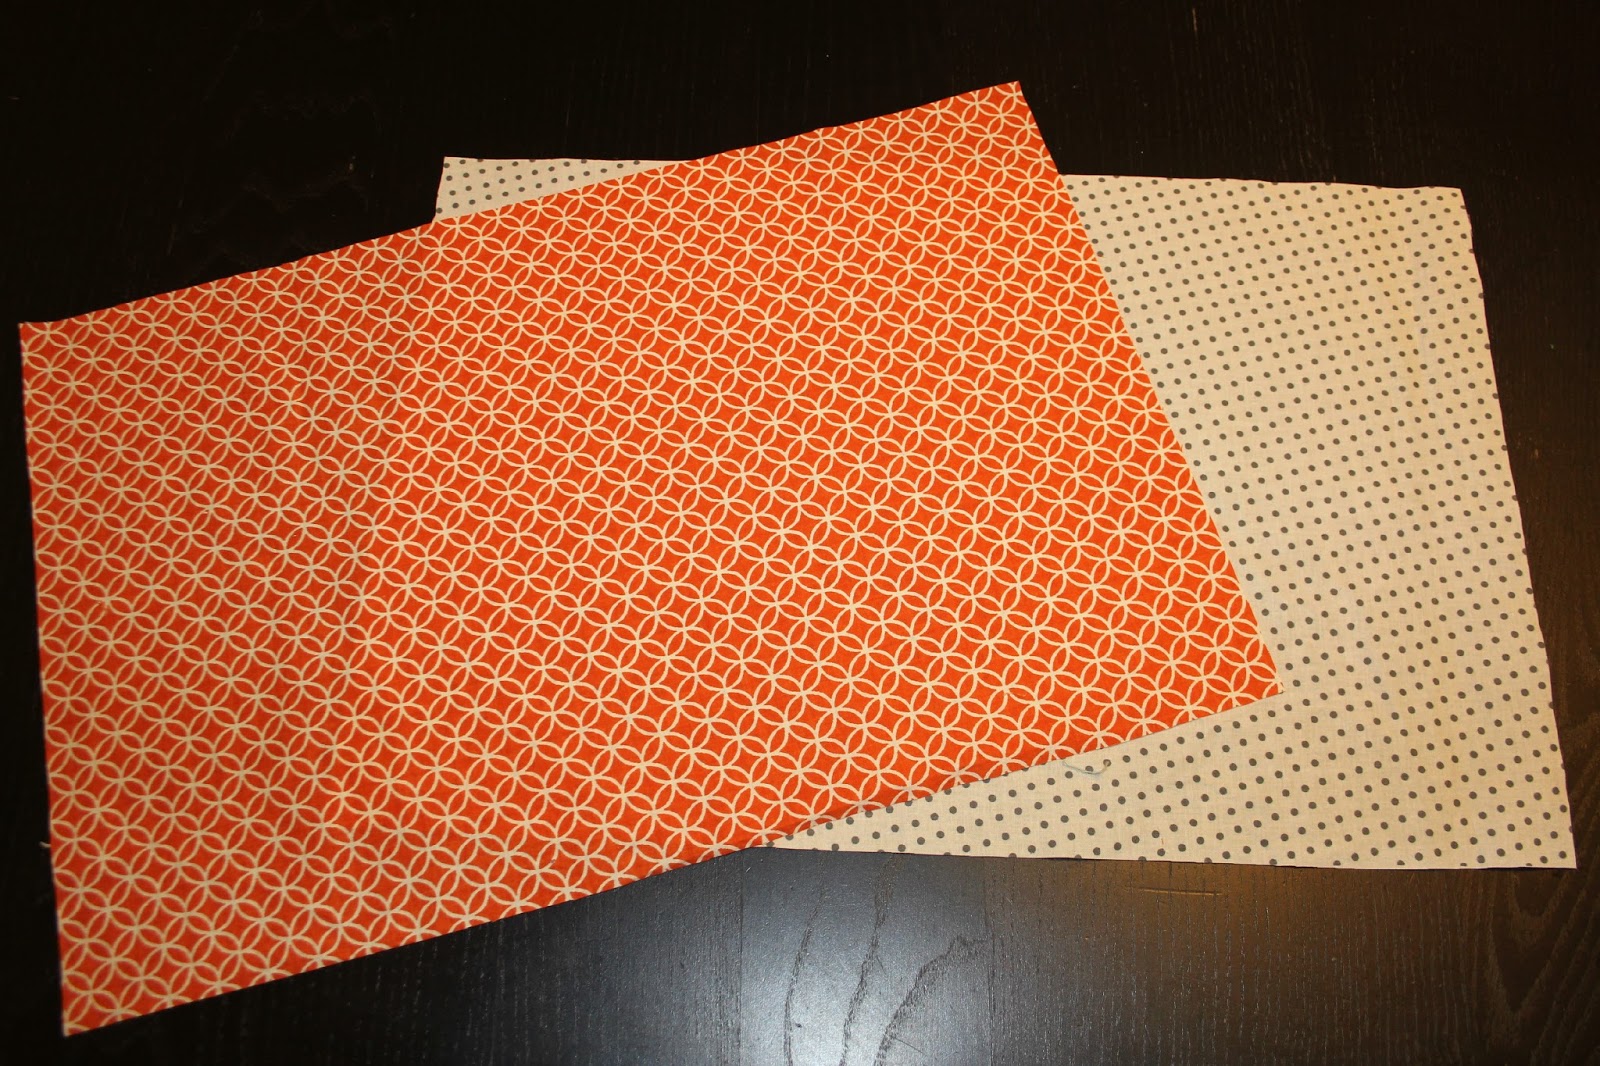
I got some fabric a few weeks ago thinking I was going to make a new tote with it, but decided to make a few place mats with it instead. They looked pretty easy, and I was excited to finally have place mats. Well, I made the place mats, and then began working on the freezer paper stencil place settings (the plate, and utensils you see on the place mat above). I finished a plate in the middle of one of my pace mats, and hated how it came out. I couldn't bring myself to do the rest of them. So for now, I am leaving my place mats how they are. I may try to sew fabric cut outs on to my place mats next time I make a batch.

Materials to make 4 placemats
2 yards of fabric- this can be two yards of the same fabric, or 2 different coordinating fabrics
sewing machine
coordinating thread
iron
(I didn't use interfacing, but I will next time I make place mats. I recommend using interfacing.)

Pre wash and iron your fabric.
Cut out (4) 12.5" x 19" rectangles in each fabric (you should have 8 rectangles total)


Place 2 right sides together and pin all the way around.


Sew using a 1/2" seam allowance leaving a 3 inch gap for turning.
Clip the corners, and trim any excess from the sides.


Turn fabric right side out, and press.
Top stitch all the way around using a 1/8" or as close as you can get it, closing the opening. & you're done!


  This project is so easy, and you'll be so proud when you can tell your dinner guests you made the place mats. It's a great project for beginner seamstresses. 

I would love for you to send pictures of your completed place mats! HootandBumble@gmail.com


Thursday, August 29, 2013

Coconut Blueberries & Cream Recipe


I love to play around in the kitchen and create new recipes, or change around an existing one. A while back I had pinned a recipe for whipped cream made from coconut milk. I found some at the grocery store, brought it home, and followed the recipe (I used confectioners sugar in mine). It was so yummy! But then I was like "well, I have this yummy whipped cream, but what do I do with it now?" I didn't have any deserts around the house, BUT I had some fresh blueberries. So the light bulb went off, and I rinsed the blueberries, and mixed them in, put them in a cute little dish I got in Charlottesville, and Jackson and I had a really yummy afternoon desert. & the best part- it was healthy! 

To make, follow the instructions for the whipped cream in the link above. Then mix in one pint of fresh blueberries. This would also work with other berries, or almost any other fruit! Top with mini chocolate chips for garnish. Enjoy!


Wednesday, August 28, 2013

New + Improved Zipper Bags!


I've been hard at work creating more amazing Hoot & Bumble products for you. I am so excited to share with you my latest works. These new zipper bags are better than ever & I know you are going to love them!

This whole Hoot & Bumble journey has been a learning experience for me. From day 1, I have worked hard to bring you quality products, and I am always searching for ways to make them better. I hope the pride I take in my work shows. 
I have played around with different ways to create each piece I make, and it has been so fun to watch my products evolve into what they are today.

My newest secret? Interfacing! I have started using a thicker interfacing that is much sturdier than the previous interfacing I was using. This new interfacing gives my bags more shape, allows them to stand freely on their own, and I love how they look and feel like much better quality! I am also boxing the bottom of the bags, and I love how it looks. Who knew a few small changes would make a world of difference?!

I have two new sizes of zipper bags to choose from in a variety of amazing fabrics. 

My large zipper bags are approx. { 8"x 6 1/2"x 2" (at the bottom)} in size, and make a great make up bag. They are small enough to fit in my Hoot & Bumble tote bag, but large enough to hold all of my make up, and some toiletries. But that's not all they can be used for; use them around the house to organize things like coupons, wires, medicines, hair accessories, etc, carry in your diaper bag for those small baby items, or even throw one in your purse as a catch all for all those random things that don't have a home. The fun prints and bright colors look amazing, and with so many styles to choose from, who can resist?!


My small zipper bags are just lovely. They are approx. { 8"x 4"x 2" (at the bottom)}, and are the perfect size to throw in your purse for some extra organization. They make fabulous pencil/pen holders, or they can hold your feminine products. I have two in my tote- one for my feminine products, and one for my lip gloss, mascara, eyeliner, and eye shadow. I'm seriously addicted.


As always we still carry our most popular item- wristlets! I will have a few new styles to choose from, in my new and improved version of the zip bags soon.


I have also reviewed my prices, and I am able to lower some prices on certain items. You'll notice that the older bags are lower priced than the new products. This is to make room for the new and improved items.

Here's the link to the Hoot & Bumble Online Shop ;)

You better snag a bag now before they sell out! 


Tuesday, August 27, 2013

{Better you Challenge}


Last weeks challenge was to get organized. Just in time for school to start :) I do this every year to help keep me on track. Then I have less temptation to slack off. Since I am a nanny, summers are usually my busiest time of year because I have all 4 kids home with me every day. So, I always welcome fall, when my schedule slows down a bit. 

This year, I am welcoming fall with open arms. This year I am only doing after school care for the family I work for, so I am home with Jackson most of every day. I am excited to get to do things with him all day, and have time to focus on Hoot & Bumble, and my school work. 

So, I sat down yesterday, and wrote out our rough, flexible schedule for the fall. I listed everything we need/want to get done, and wrote out a schedule. I set certain days of the week for library day, and other classes he may participate in. 

I also went out and bought a bunch of school supplies that we will need for what I have planned in Mommy School this year. 

I feel like everything is in order for a smooth year. I am so excited to be starting a fresh year. I really do love this time of year, even though I am sad to see summer go.

How did you get organized to get ready for fall?

I recently read an article about the nuclear radioactive junk that is being dumped into the waters from Fukushima. It is traveling as far as Alaska, and harming wild life. People are cautioning against eating anything that comes from those waters. I have been thinking a lot about the earth since I read that, thus where this weeks challenge comes from. This weeks Challenge is to do something for the earth. Even if it's just picking up trash, or planting a few flowers. Please do anything to make our earth a better place. We need to leave a clean earth for our children, and grandchildren. Don't leave our messes for them to clean up. 
For those interested, the link to the article I read first is no longer working, but here is a similar article: http://abcnews.go.com/International/wireStory/radioactive-ground-water-fukushima-nears-sea-20044298 

Please let me know if you participated in last weeks challenge, and come back to share how you helped the earth for next weeks Better You Challenge!

Monday, August 26, 2013

Mommy School


In honor of the kids going back to school, and everyone getting back on a normal schedule, I am going to start Jackson on my own {home school} preschool curriculum. I really wanted to send him to preschool this year. He is so ready for school, and to be away from me for a few hours a week. I could use the time to work on Hoot & Bumble stuff, and get school work done too. But since I didn't know where I was going to be working, I couldn't sign him up. As a result, I missed the cut off for preschool registration. This means Jackson gets the pleasure of spending another year home with me :)

Each day I am going to aim to do some kind of learning activity with him. We are big on learning through play around here, but I also like to throw in a few traditional style activities once in a while. 

Each week, I am going to show you at least one of the activities we are doing around here in what I am calling Mommy School. As always we will continue to go on outings, have frequent play dates, and do crafts often. Most of the activities I show you will be geared towards older toddlers and young preschoolers because Jackson is 3 years old. But many of them will be able to be adjusted for the age and development of your child.

1st day of Mommy School is today. Jackson has the best teacher ever! I'm excited and can't wait to show you what we are up to! I hope you will use my ideas to work with your own children. Please share your ideas, too!
It's going to be a great school year!

Check back next week to see how our first week went!


Saturday, August 24, 2013

Winner of the Giveaway + Blog Announcement


This week was such a busy week for our family. 

Kyle worked 56 hours, and Jackson and I didn't see him all week. I worked long hours too. Weeks like this are hard on our family. It was also the last week of summer for the kids before they go back to school so we tried out best to cram in all of those last minute fun activities. 

So long story short, I slacked off with writing blog posts all week since I wasn't able to plan ahead and schedule my posts like I try to do each week. It's hard to want to come home and write when you worked 10 hour days and didn't get home until 9 pm. You can expect a full week of great posts from me next week. Since the kids are back to school on Monday, I am working less hours from now on. I'm so happy that everything is working out, and that we stressed about my cut in hours for nothing. I'm also super happy that I still get to be with our son all day, and now I get to be home with him even more. Thank God. He really does always have a plan. 

I am super excited to announce the winner of my first giveaway! I am so happy with the participation from this giveaway and will definitely be doing them more in the future. Thank you to all that took the time to enter, and share this blog! Rafflecopter.com was so east to use to set up and run the giveaway, and it kept all the details organized for me.

Finally, the winner of the Message in a Bottle Necklace, & a small zipper bag is Christina Zeigler Kirby! Congrats! Christina, you can contact me at HootandBumble@gmail.com or message me on Facebook to claim your prize!

Have a great week everyone! Don't forget to work on the Better You Challenge and update us on Tuesday of your progress!


Wednesday, August 21, 2013

Hoot & Bumble's 1st Giveaway!


*Winner of the giveaway is Christina Zeigler Kirby! Christina, please contact me to claim your prizes!*


The title of this post says it all. I have waited so long to do a giveaway because I wanted it to be a good one. I am excited to share Hoot & Bumble products with you, and can't wait to choose a winner! 

An item I am adding to the Hoot & Bumble online shop in a few days is one of our newest designs: The Message in a Bottle Necklace! How fun?!


One lucky fan is going to win one of these simply gorgeous accessories + another new item, a small zipper bag.

The necklaces are so feminine and precious, and will look great with any outfit! I wore mine out for a date night with my favorite man this past weekend. My favorite part about the message in a bottle necklace? The message, of course! I am giving you the option of choosing the paper for inside the necklace, and the message on the piece of paper {or I can surprise you, and choose a secret message for you}.

Each necklace is on 28 inches of chain, and has a magnetic clasp for easy wear.


I chose a pretty blue polka dot paper for my personal necklace, and the message I chose rolled up inside the paper says "never give up", something I've been telling myself a lot lately. 


Another great feature of this necklace is you have a great selection of paper patterns for inside the bottle. At checkout all you have to do is choose your paper, and let me know what message you would like inside your bottle.  


Hoot & Bumble's new small zipper bags are perfect for keeping all of your smaller items organized. I use one for pens and other small school supplies, and another one for all of my lady things. This bag is a brand new Hoot & Bumble style and they are not even listed yet! More on these amazing bags in an upcoming post!


Follow the prompts below to enter to win!


Tuesday, August 20, 2013

{Better You Challenge}


Last week I challenged you to spend some extra quality time with your children. Sometimes in the day to day hustle of life we forget to slow down and enjoy our children for who they are, and laugh at the little things. I know this is something I feel like I am constantly working on. After all, they are only little for so long. 

I am lucky in that I get to spend all day every day with our Jackson. Although it can be tiring, I enjoy it so much, and I am so thankful that I get this time with him. I will miss it immensely when he's grown. 

This week we spent some time one on one, and as a family, just enjoying each other. On Sunday we stayed in all day, and just hung out together. I spent time doing free art with Jackson, which is something we both love doing together. I love sharing my creativity with my son, and love watching him figure out his own creative style. He so brilliant :)

This weeks challenge comes just in time for school to start for the older children. If you have younger children who are not in school yet, their fall classes, or new activities may be starting. Either way, you can play along with this challenge. 

Every year around this time, I like to sit down, and make a plan for the school year. I try to write down all of our activities, and make a schedule for us to follow. It's a fresh start for the school year, and a plan so I don't slack off. So this week, I want all of us to make a schedule of everything we plan to get done every week. Go get yourself a pretty planner book, and actually write stuff in it :) Set yourself up for a good year- also organize anything else you've been meaning to get to lately- like that stack of papers on the kitchen counter. I will tell you more about  my start-of-the-school-year-routine next week after we all complete the challenge. 

Monday, August 19, 2013

A Week at a Glance

We had a good week. A hike in the woods,


 A break while hiking,


Practicing some letters,


A new neighbor friend for Jackson,


Jackson dressed up for a visit to Yiayia and Papou's house. The second outfit was the next day.


Being goofy,


A casino, and game date night with my handsome hubby,


& a Sunday morning spent crafting with my little guy. 


Life couldn't get any better than this. <3 Enjoy your week!


Friday, August 16, 2013

50 Awesome Children's Books for Young Readers


Right around the time I got my first job as a camp counselor, I started collecting children's books. I was 14 years old at the time. By the time I had Jackson in 2010, I had an impressive collection of children's books. I even asked my dad to build a bookshelf for Jackson that I designed. He did, and that's where we store all of our children's books.

So, it's safe to say that I LOVE children's books. I love everything about them. Especially the ones with great pictures, and rhyming words.

"Children are made readers on the laps of their parents." -Emilie Buchwald

We read to Jackson every single night before bed. It's something we all look forward to. & we all have our favorites and take turns picking books out. It's such a special family activity to us, and sends a great message to our son.

I have put together a list of must-reads for your young child.

1. The Very Hungry Caterpillar by Eric Carle
2. Edwina the Dinosaur who didn't know she was Extinct by Mo Willems
3. One Fish, Two Fish, Red Fish, Blue Fish (And other Dr. Suess books) by Dr. Suess
4. My Truck is Stuck by Kevin Lewis
5. Goodnight, Goodnight Construction Site by Sherri Duskey Rinker and Tom Lichtenheld
6.  Dragons Love Tacos by Adam Rubin and Daniel Salmieri
7. Extra Yarn by Mac Barnett
8. The Napping House by Audrey Wood
9. Moosetache by Margie Palatini
10. Llama Llama Red Pajama (And other Llama Llama books) by Anna Dewdney
11. The Going to Bed Book by Sandra Boynton
12. Where the Wild Things Are by Maurice Sendak
13. The Giving Tree by Shel Silverstein
14. We're Going On a Bear Hunt by Helen Oxenbury and Michael Rosen
15. Goodnight Moon by Margaret Wise Brown and Clement Hurd
16. This is your Hair By Tood Parr
17. HICCUPotomus by Aaron Zenz
18. Someday by Allison McGhee
19. Spoon by Amy Krouse Rosenthal and Scott Magoon
20. If You Give a Mouse a Cookie (And other If You Give... books) by Laura Joffe Numeroff and Felicia Bond
21. I'll See You In the Morning by Mike Jolley and Mique Moriuchi
22. Diary of a Worm (And other Diary of... books) by Doreen Cronin and Harry Bliss
23. The Crayon Box that Talked by Shane Derolf and Michael Letzig
24. Brown Bear, Brown Bear by Bill Martin Jr. and Eric Carle
25. Mrs.McBloom, Clean up your Classroom! by Kelly Di Pucchio and Guy Francis
26. Mrs. Wishy Washy's Farm by joy Cowley and Elizabeth Fuller
27. The Rainbow Fish by Marcus Pfister
28. Freckleface Strawberry by Julianne More
29. Corduroy by B.G. Hennesy and Jody Wheeler
30. Roadwork by Sally Sutton and Brian Lovelock
31. Snowmen At Night (and other Snowmen books) by Caralyn Buehner and Mark Buehner
32. Guess How Much I Love You by Sam McBratney and Anita Jeram
33. The Goodnight Train by June Sobel and Laura Huliska-Beith
34. There's a Rumble in the Jungle by Giles Andreae and David Wojtowycz
33. Curious George by H.A. Rey
34. The Potty Train by David Hochman
35. How Do Dinosaurs Say I love You? by Jane Yolen and Mark Teague
36. Oh No, Little Dragon! by Jim Averbeck
37. The Best Nest by P.D. Eastman
38. God Gave Us You by Lisa Tawn Bergren
39. On The Night That You Were Born by Nancy Tillman
40. Baby Beluga (And other Raffi books) by Raffi
41. What Makes a Rainbow? By Betty Ann Schwartz and Dona Turner
42. Hands Are Not For Hitting (And other books from the Best Behavior Series) by Maritne Agassi Ph.D.
43. Chicka Chicka Boom Boom by Bill Martin Jr.
44. Willow by Denise Brennan-Nelson
45. Dragons Love Tacos by Adam Rubin
46. Bedtime is Cancelled by Cece Meng and Aurelie Neyret
47. Hippopotamus Stew by Joan Horton and JoAnn Adinolfi
48. Stone Soup by Ann Mcgovern and Winslow Pinney Pels
49. Caps for Sale by Esphyr Slobodkina
50. Little Blue Truck by Alice Achertle and Jill McElmurry

So, go check some books out at the library, or order them from amazon.com! Books ALWAYS make great gifts! As always, read, read, read!

Also, which books from this list are your favorites? What are your favorite children's books not on this list? We are always searching for new books! Please share!


Thursday, August 15, 2013

First Dance + Song Lyrics Wedding Picture Part 2: How to Make a Photo Canvas


A few weeks ago, I showed you how to create a Wedding Song Lyrics Picture. Now it is time to mat that picture to a canvas to turn it into some beautiful + sentimental home decor artwork.

If you're like me, you love the look of those beautiful printed photo canvas's many places are now offering. Those things start at around $40 a pop! I figured out a way to make them- super cheap, without sacrifices any of the quality.

First I printed out the picture. I sized my picture to an 8x10 when I created it, so that's the size I printed it out as. I like to use Snapfish.com to order my pictures. I like the convenience of being able to choose if my pictures will be shipped to me, or if I am going to go pick them up at one of their pick up locations. I typically order them and have them shipped to me. It is cheaper that way, and I like their quality better than the in store locations. However, this time I ordered it online and picked it up at Walgreens. The quality was pretty good, thankfully.

For this project, you'll need: 

A photo ($3.99 Walgreens through snapfish)
A Canvas the same size as your photo ( $4 while on sale at JoAnn Fabrics)
Black paint (already had)
Paintbrush (already had)
A sponge brush ($1 at dollar store)
Mod Podge (not pictured above) ($10 for 16 oz on Amazon Mod Podge Original 16-Ounce Glue, Matte Finish, but you will use less than an ounce for this project. I already had some. It's great to keep around the house since it can be used for so many projects)

First, I painted the sides of the canvas black. I typically leave mine white because I like the look, but for this photo I did paint the sides because the photo I am using for this project is dark with a lot of black shadows. (I have also seen people use scrapbook paper or fabric for the sides, but when I tried it, it didn't work out too well, and I ended up giving up on that step.) 
You don't have to paint the whole canvas. Just the sides like in the picture below. 


After that is dry, put a layer of Mod Podge on the top of the canvas. 
{A little note about Mod Podge. This stuff is amazing. There are many different kinds and finishes of Mod Podge. For my canvas's I use the matte finish because canvas's are not shiny. There are also recipes out there to make this stuff. It's basically just like school glue.}
This link below will take you to Amazon.com to buy matte finish Mod Podge. If you buy using this link, I will get conpensation for your purcahse because I am a part of Amazon Associates, an affiliates program.
Mod Podge Original 16-Ounce Glue, Matte Finish


Lay the photo on top of the canvas, and make sure the sides line up with the sides of the canvas. 


With the sponge brush, coat the top of the photo with mod podge. This layer should be an even layer of horizontal strokes only. It goes on white, but don't worry, it dries clear. *Wash out your brush with warm water in between coats. The mod podge dries fast, and if it dries on the brush you won't be able to use the brush for the next coat.* Let the first coat dry completely before moving on.


Next, do a layer of even vertical strokes. Let it dry completely.


Lastly, I touched up my black painted sides with more black paint. Probably something I should have done first, but I was impatient.

I like to do my canvas's this way because the two layers of horizontal lines then vertical lines dries, and you can see the cross sections, so it looks like an authentic printed photo canvas. I have so many of these up around my house, and I get so many compliments on them. If you look at the picture below, you can see how good the cross lines look. 


I hung my photo canvas in our master bedroom above two frames that already had wedding pictures in them. I think it adds the perfect personalized touch. This would make an excellent anniversary present for someone. 


Here are a few other photo canvas's around my house: 


(This gallery is over our living room couch. Our amazing family photo's were taken by Hello Darlin Photography)


You can really do a lot with these canvas's. They look so good, and can transform any space. Send me your finished projects when their done! I want to see them! 

HootandBumble@gmail.com


Elizabeth
xxxx

 {I did not receive any money from picmonkey.com or snapfish.com for recommending them. All thoughts are my own.}